Variable Angle Dovetails with the Akeda Dovetail Jig

|
By combining the ability of the Akeda to repeatably locate its guide fingers with its ability to make multiple dovetail angles (dependent on stock thickness) we can create a single joint with multiple dovetail angles. There are a few ways to do it, the simplest would be to have each of the pins have the same angle on both sides. This way when the tails are made it takes only one pass with a single angle. I think it looks better to have the tails have the same angle on both sides, in particular the half pins don't look right when done the other way. The down side is wider pins. To do this you have to offset the guides by one increment to get different angles on each side when routing the tails. In this example I started with the largest angle at the edges and then decreased towards the center. I skipped one angle for more of an effect, so the angles are 20, 11, 7. The stock is 5-1/2" wide and 1/4" thick. It would have been better with 5-3/4 stock to get wider half pins with the larger than normal pins. 1. I began with the pins, since that didn't involve changing bits. I neglected to take any photos until after I had routed all the pins. I began with four 20 degree guides set at the edges and with no space between them. Route only between the guides. 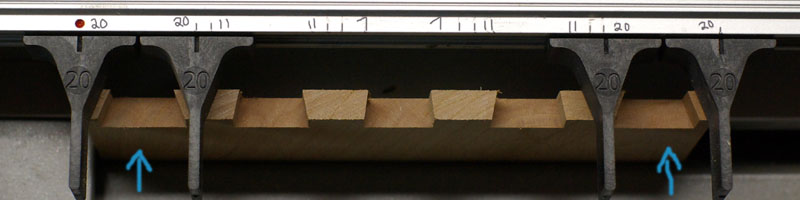
2. Note that I have marked all the guide finger locations on the rail as well as the angles. Now remove the inner two 20 guides and replace them with 11 degree guides, but shift over one increment. You can also remove the outer 20 degree guides to avoid any confusion. Be sure to route only between the two pairs of guide fingers, not the outside or the middle. 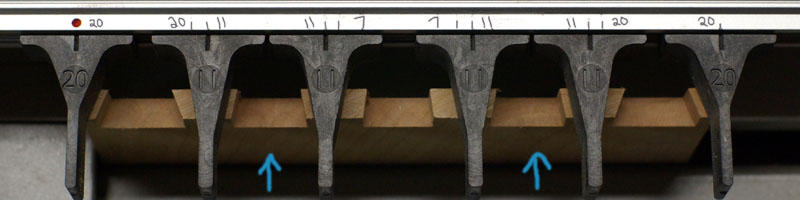
3. Last pass on the pins, same as before but this time replacing the inner 11 degree guides with 7 degrees. 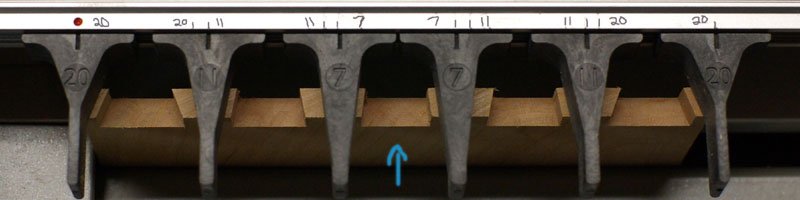
4. Now onto the tails. We set up the tail guides on the same marks we used for each angle. Having the angles written on the rail makes this easy. Start with the outer 4 marks and the 20 degree bit. 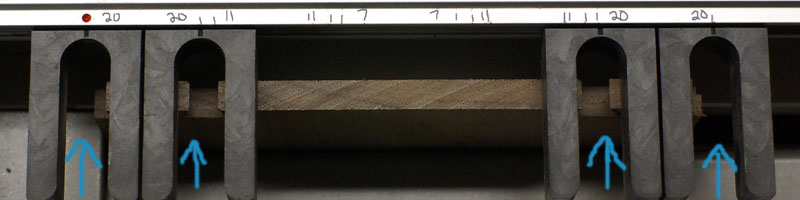
5. Switch to the 11 degree bit. You can use the half pin cuts to make sure the bit is set to the exact same depth. 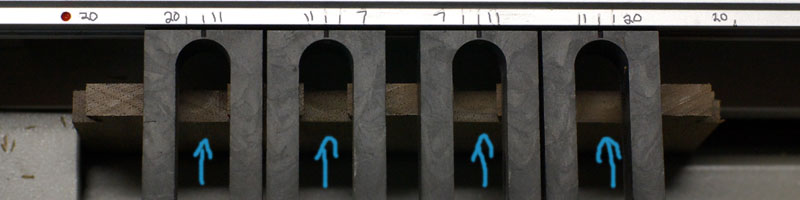
6. Finally the last pass with the 7 degree bit. 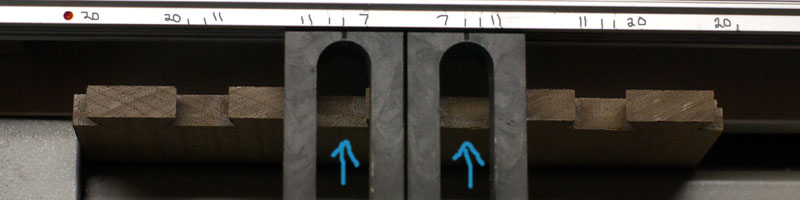
Done!
It really wasn't difficult to keep this all straight, and this was the first time I tried it. The key is to work it all out on the guide rail ahead of time. The wider and thinner the stock the more options you have. What I like most about the Akeda is it gives you the confidence to experiment because you know the jig is going to do its part every time. |